Project Finsbury is Complete
Back in October 2025 I was on the lookout for a new project, this time a property to renovate, then rent out. I’d been viewing properties around North London for a few months, but nothing seemed quite right. Then, I had a bit of a crazy idea – what if I bought at online auction? I’d been on the mailing lists of the property auction houses for years, but I’d never quite been a position to buy before. But this time I was, I had the budget for a smaller property, and I had my trusted RenoVersity method, and team behind me, from mortgage advisors to architects and contractors, so I thought, why not?!
I trawled through the online catalogues, and there were actually a number of properties that fit the bill. I had the criteria of a one-bedroom apartment which could be reconfigured into a two bedroom (or office space), with freehold or share of freehold for some control over the renovations. A garden was a bonus because potential to extend in future would further make it an even better investment. I set off for many weeks of viewings, ready to go – but I was not ready for just how competitive the online bidding would be! I was surprised when most of the properties I bid on sold for double or more than double the guide price.
But on one particular auction, I noticed that while I was bidding for a different property (and was swiftly outbid) that this property did not sell, not knowing exactly why, I contacted the auction house and booked in a viewing straight away, and I really liked it. Yes, there was an absolutely huge amount of work to be done (perhaps why it didn’t attract as many bids) but it ticked all the boxes; one bedroom with a spacious bathroom upstairs on the split level that could be better used, it was on ground level and it had direct access to a private garden for future extension potential, it also came with the freehold, with only one other apartment set within the once beautiful Victorian building.
I placed my offer straight away which was accepted, and the race began. Most auction property transactions need to complete purchase within 28 days, and if you are aware of the UK property purchase system, you’ll know that most purchases take three to four months! So the pressure was on. I worked with some great solicitors who went above and beyond to push the legals through just in time – despite the seller’s solicitor’s not even picking up the file and noting the deadline until nearly two weeks into the process! But by the end of November, I was the owner of a very, (very!) run-down property that hadn’t been maintained or looked after very well since the 1980s, I was itching to get started and bring back the life, character and beauty to this apartment, but with travel booked to Cape Town to see family, and the Christmas holidays coming up, I decided to hold off on starting works in earnest until January 2026.
Watch the video with before and after photos below:
The Layout
If you’ve been reading the blog, or listening to the podcast for a while, you may know just how much I love exploring different layouts for any property – large or small – always spending hours exhausting all options until I figure out not only the best use of space, but also the best functionality for the inhabitants. With Project Finsbury, I took into consideration the layout of not only my apartment, but also the apartment above, in relation to how noise might travel, and also planned to add additional noise insulation where needed.
Another very important element to consider when designing layout, is the light, the old kitchen was situated in the darkest room in the property, while the bedroom was set at the rear with south facing light, and direct access to the garden, it seemed obvious to me that these rooms should be swapped, the works would be more expensive with moving all the plumbing and drainage, but I knew long-term that this would be the best decision, for both useability and ROI.
Moving the kitchen to the sunnier room also provided an opportunity to add one of my favourite elements – a place to sit in the kitchen. Even in a small kitchen, I always try and fit in a place to sit, I think it makes for a much more sociable space – especially for the cook, and provides an everyday opportunity to sit, connect and enjoy a meal or a drink in the company of those that you live with.
Upstairs on the split level was a very spacious bathroom – well in London terms, and in relation to the size of the rest of the apartment anyway! With some careful layout planning and relocating a door, I figured out a way to divide the bathroom into a small but functional shower room and a separate home office or small second bedroom – perfect for a couple or a family with a baby or young child.
The Build
Because I’ve been renovating for many years now, I’m lucky to have a number of great contractors on speed dial. So as soon as the property purchase went through, my chosen builder was on standby to start demolition.
It was obvious at the point of viewing that the property had some damp issues, but just how extensive it was, only became clear once the demo started. The floors were solid and in good condition considering the previous neglect, but the walls were another story. Huge chunks of plaster were coming away from the walls and the extent of the damp became very obvious. We also sadly lost a gorgeous Victorian marble fireplace in the process that I wanted to keep and restore, the plaster was so unstable that it fell away and broke into pieces. Luckily there was another fireplace surround in walnut in the kitchen that was saved, I decided to move this to the livingroom to replace the marble one and used the opportunity to carry the walnut through the design of the apartment.
I stopped work straight away and called in the damp proof specialists who worked with me to find a tanking solution to protect the property and make it dry and healthy once more. And a couple of weeks later the build works could resume.
As I expected and had planned for, the entire apartment had very old wiring, plumbing and heating systems, which has to be completely replaced with new. But another unexpected surprise was that absolutely none of the ceilings had ever been fitted with sound insulation! So I had that remedied too and added additional sound insulated plasterboard to the ceilings as well. All of these details and improvements would make a huge difference to not only my future tenants, but also to the apartment above.
Once my contractors were back in, we sped ahead with plasterboarding, plastering, flooring, decorating and the second fix (fitting the the kitchen cabinets and carefully chosen tapware and bathroom fixtures).
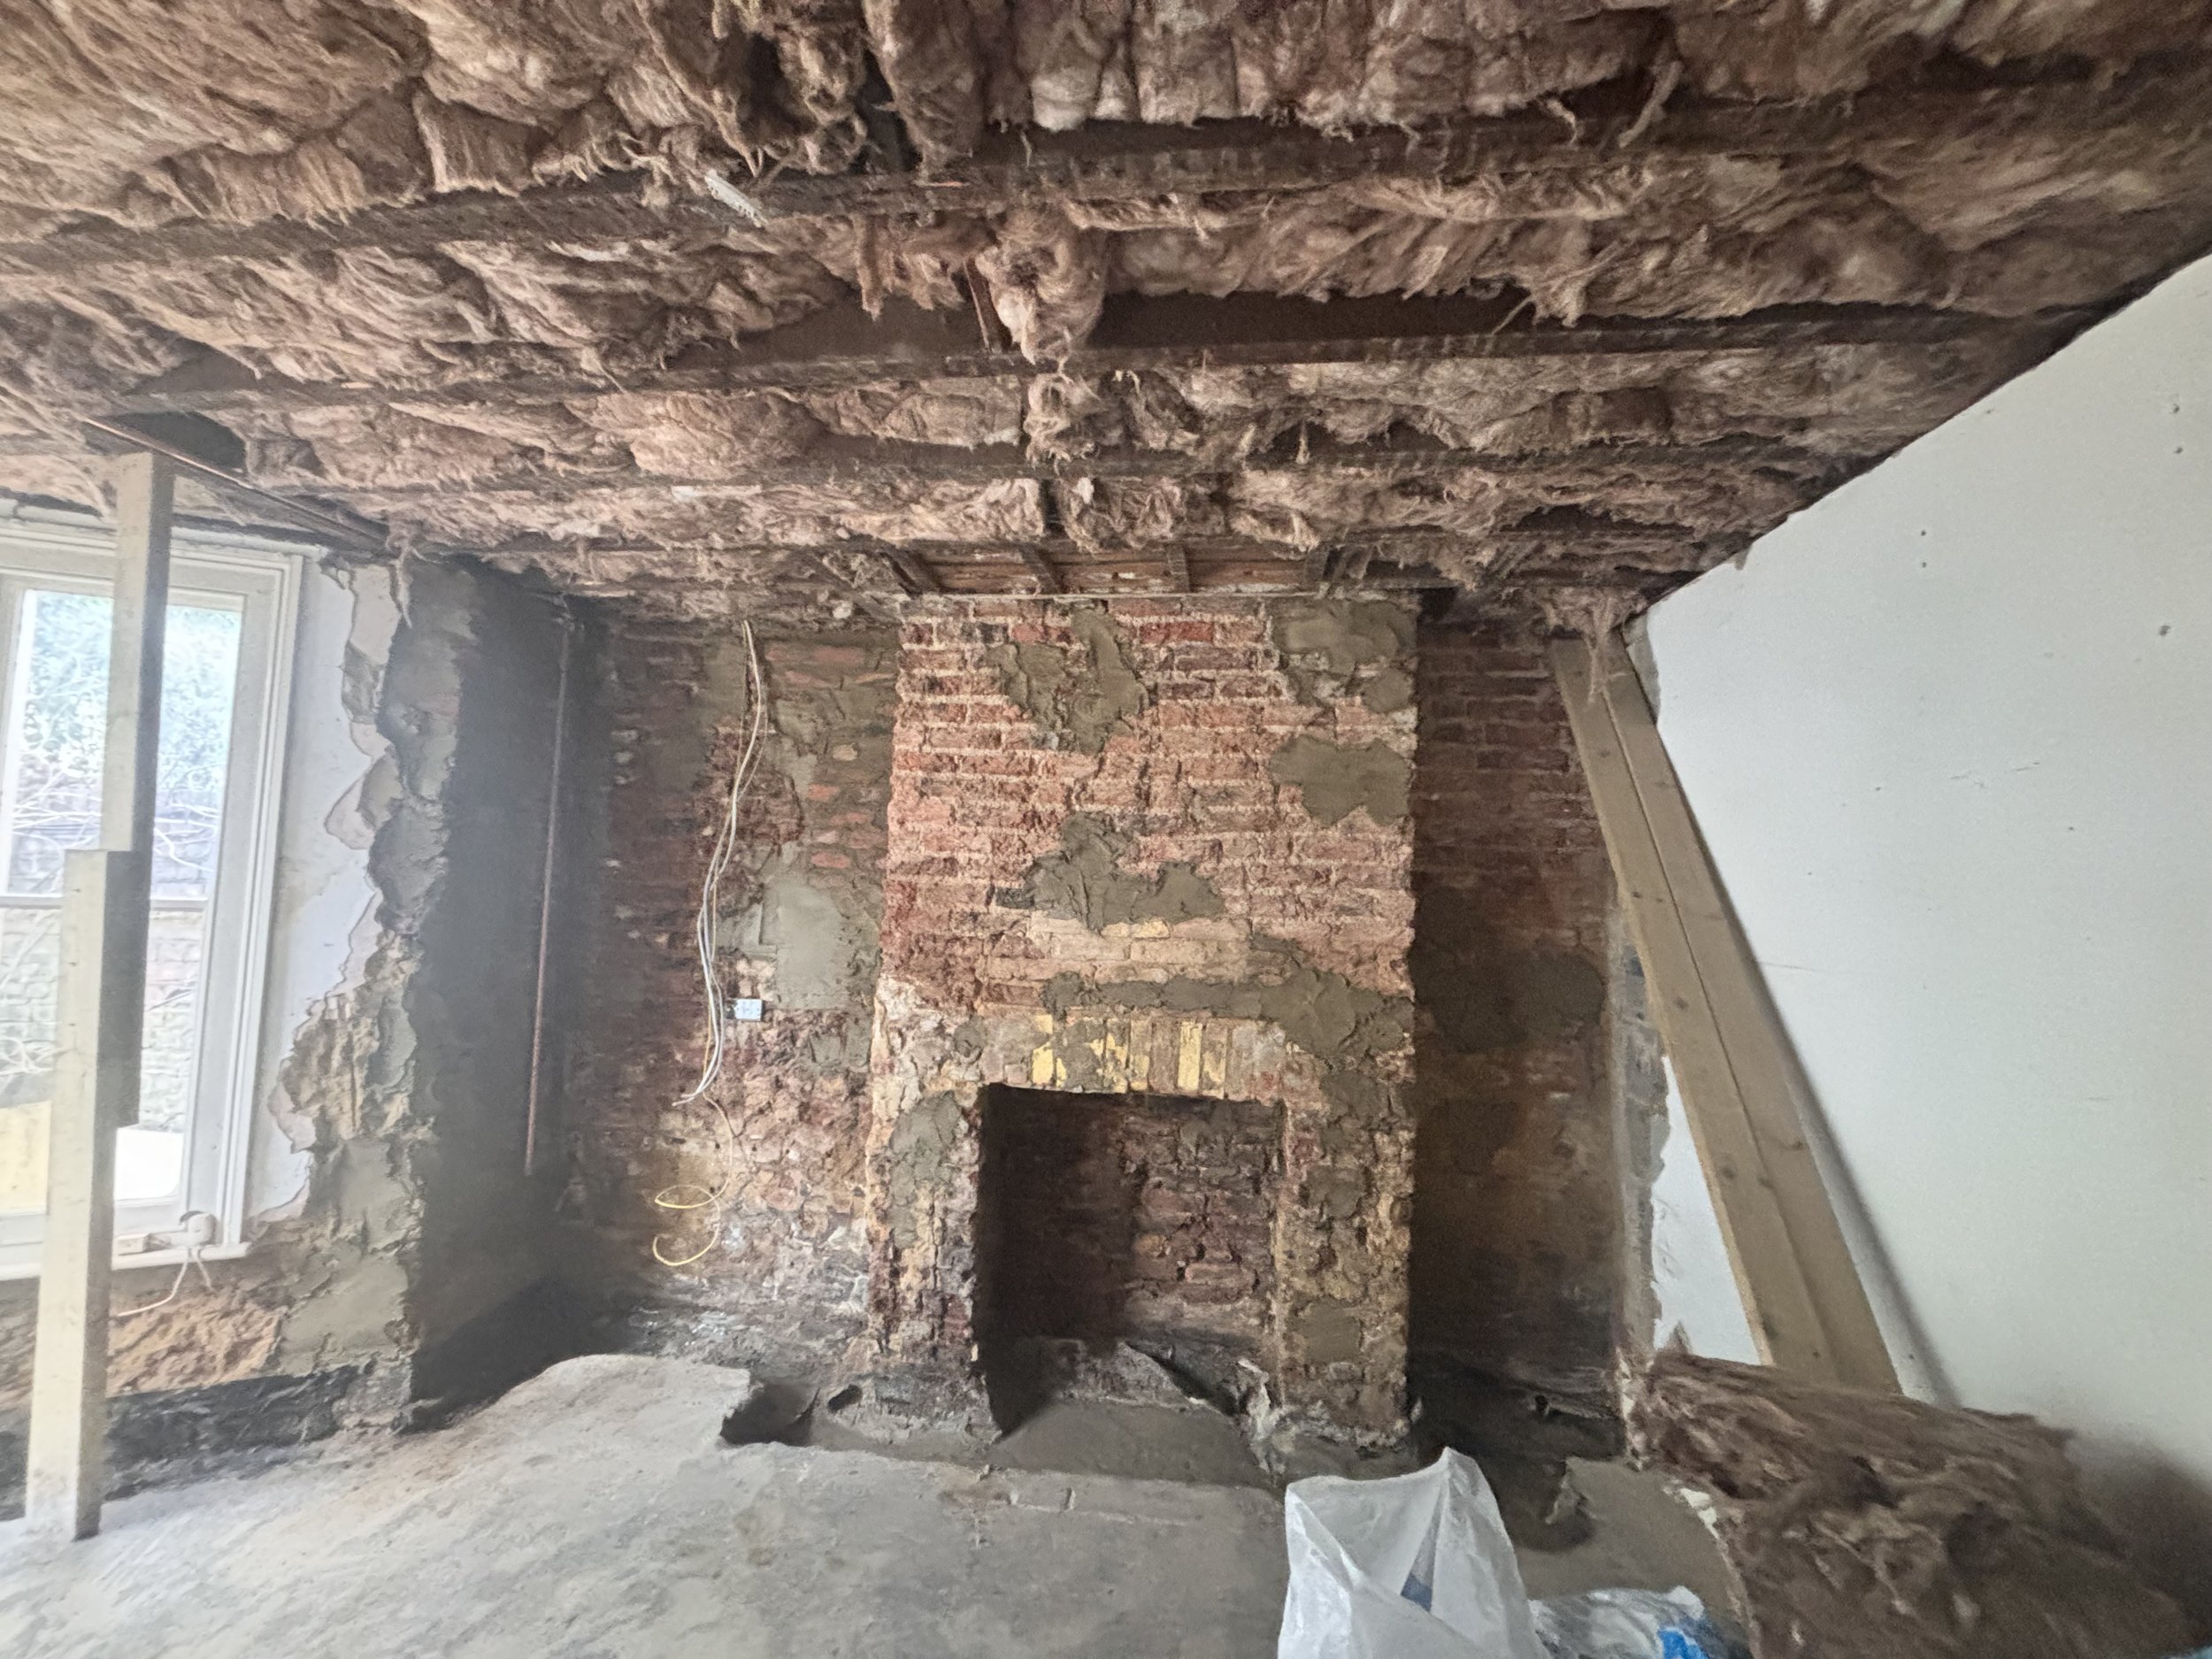
The demo work exposed years of neglect and the property had to be stripped back to brick in affected areas.
The Interior
I had to be very considered with the interiors on this project. I wanted it to be clean, classy, and appeal to a design-loving person or couple, and I wanted it to be so appealing that tenants viewing it would be impressed at the level of thought, detail and style, but it still had to fit my budget and be practical and hard-wearing in all the right places. So I set about making some very careful choices.
The walnut fireplace surround rescued from the old kitchen set the tone, the exterior doors were awful and needed to be replaced, but the interior doors, although not original Victorian, were in reasonable condition, were walnut coloured wood, and already had brass doorknobs, fitting in with the plan for the interior, so I decided to keep them.
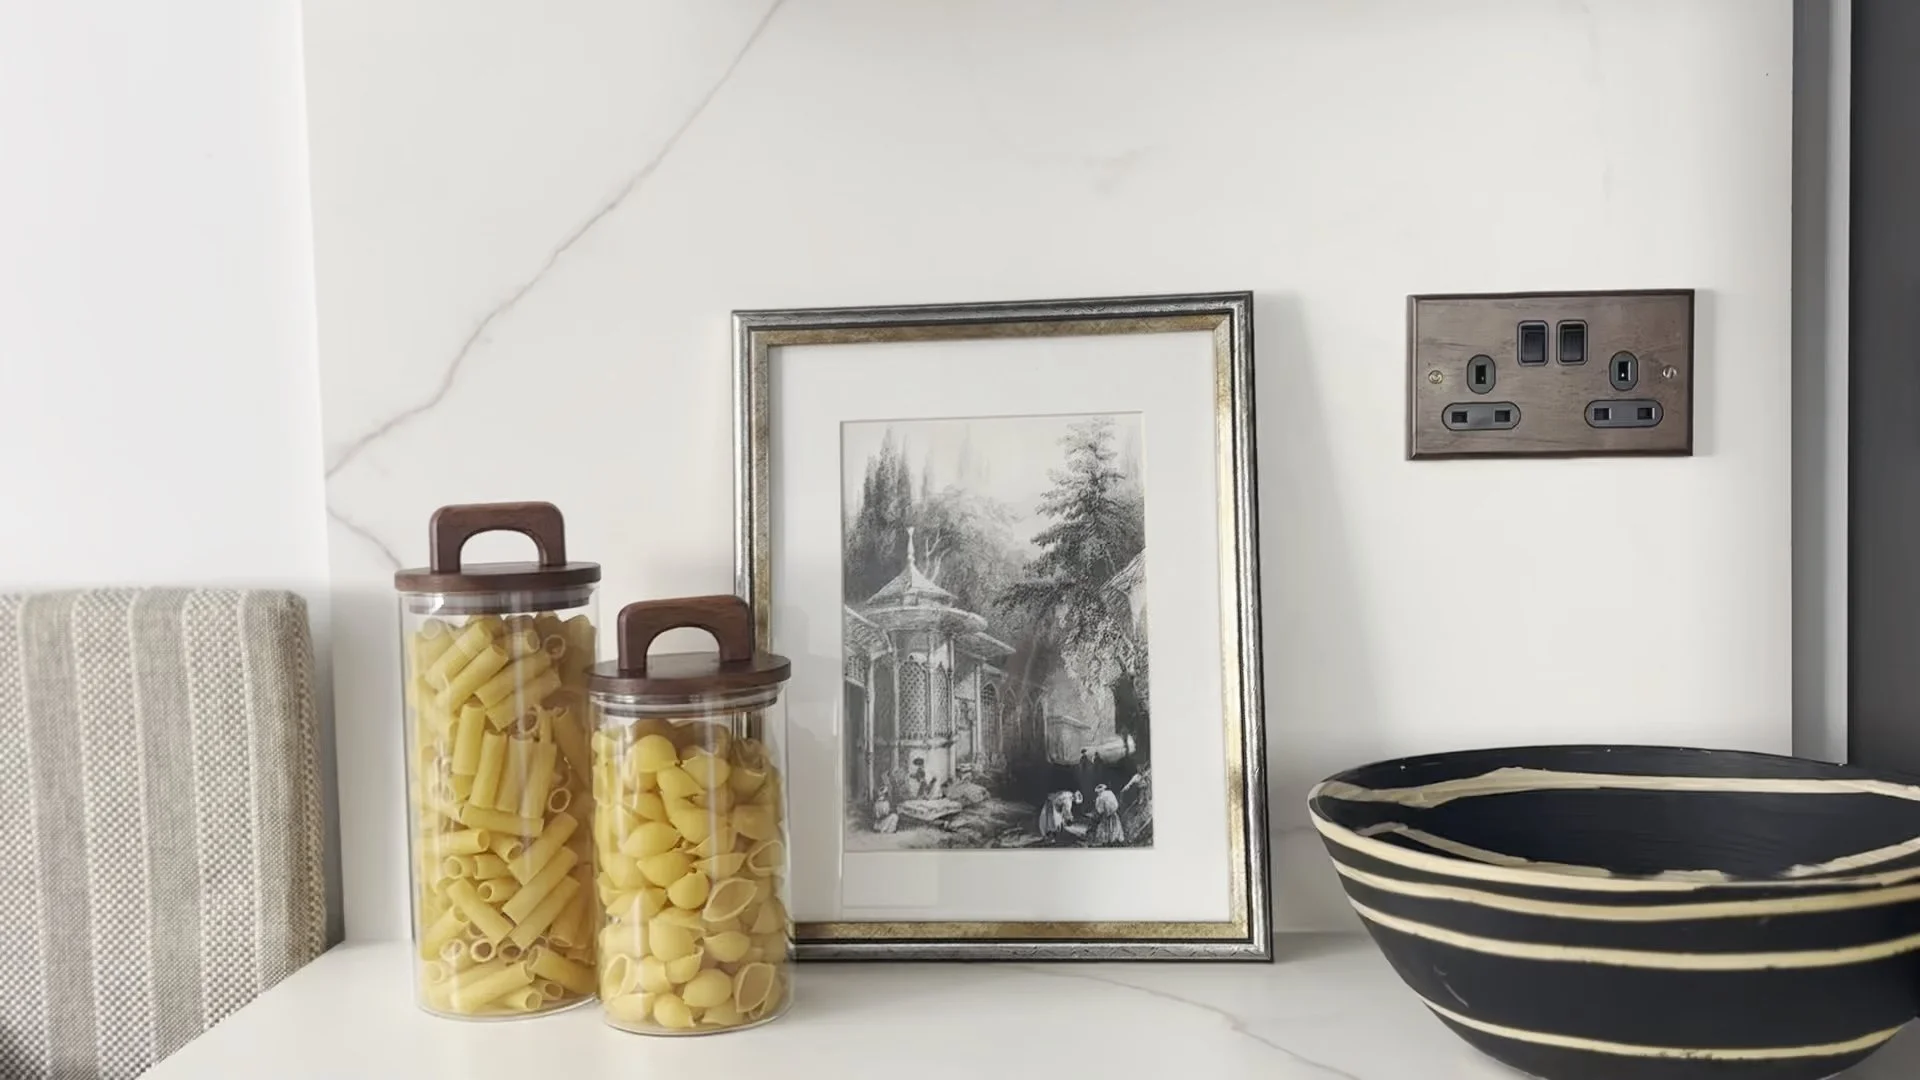
Working with the scheme, I created the moodboard that would serve as the template for the design, I wanted the dark walnut to be complimented with brass, bronze, pale walls, and the stone, quartz and tiles to have subtle golden veining. I brought in an earthy palette of textures and colours for some of the lighting and just a few terracotta elements in the small garden. There are some details I’m really pleased with in this property, like the brass and walnut toggle light switches, the oversized half circle walnut door handles and the antique vanity unit.
Project Finsbury
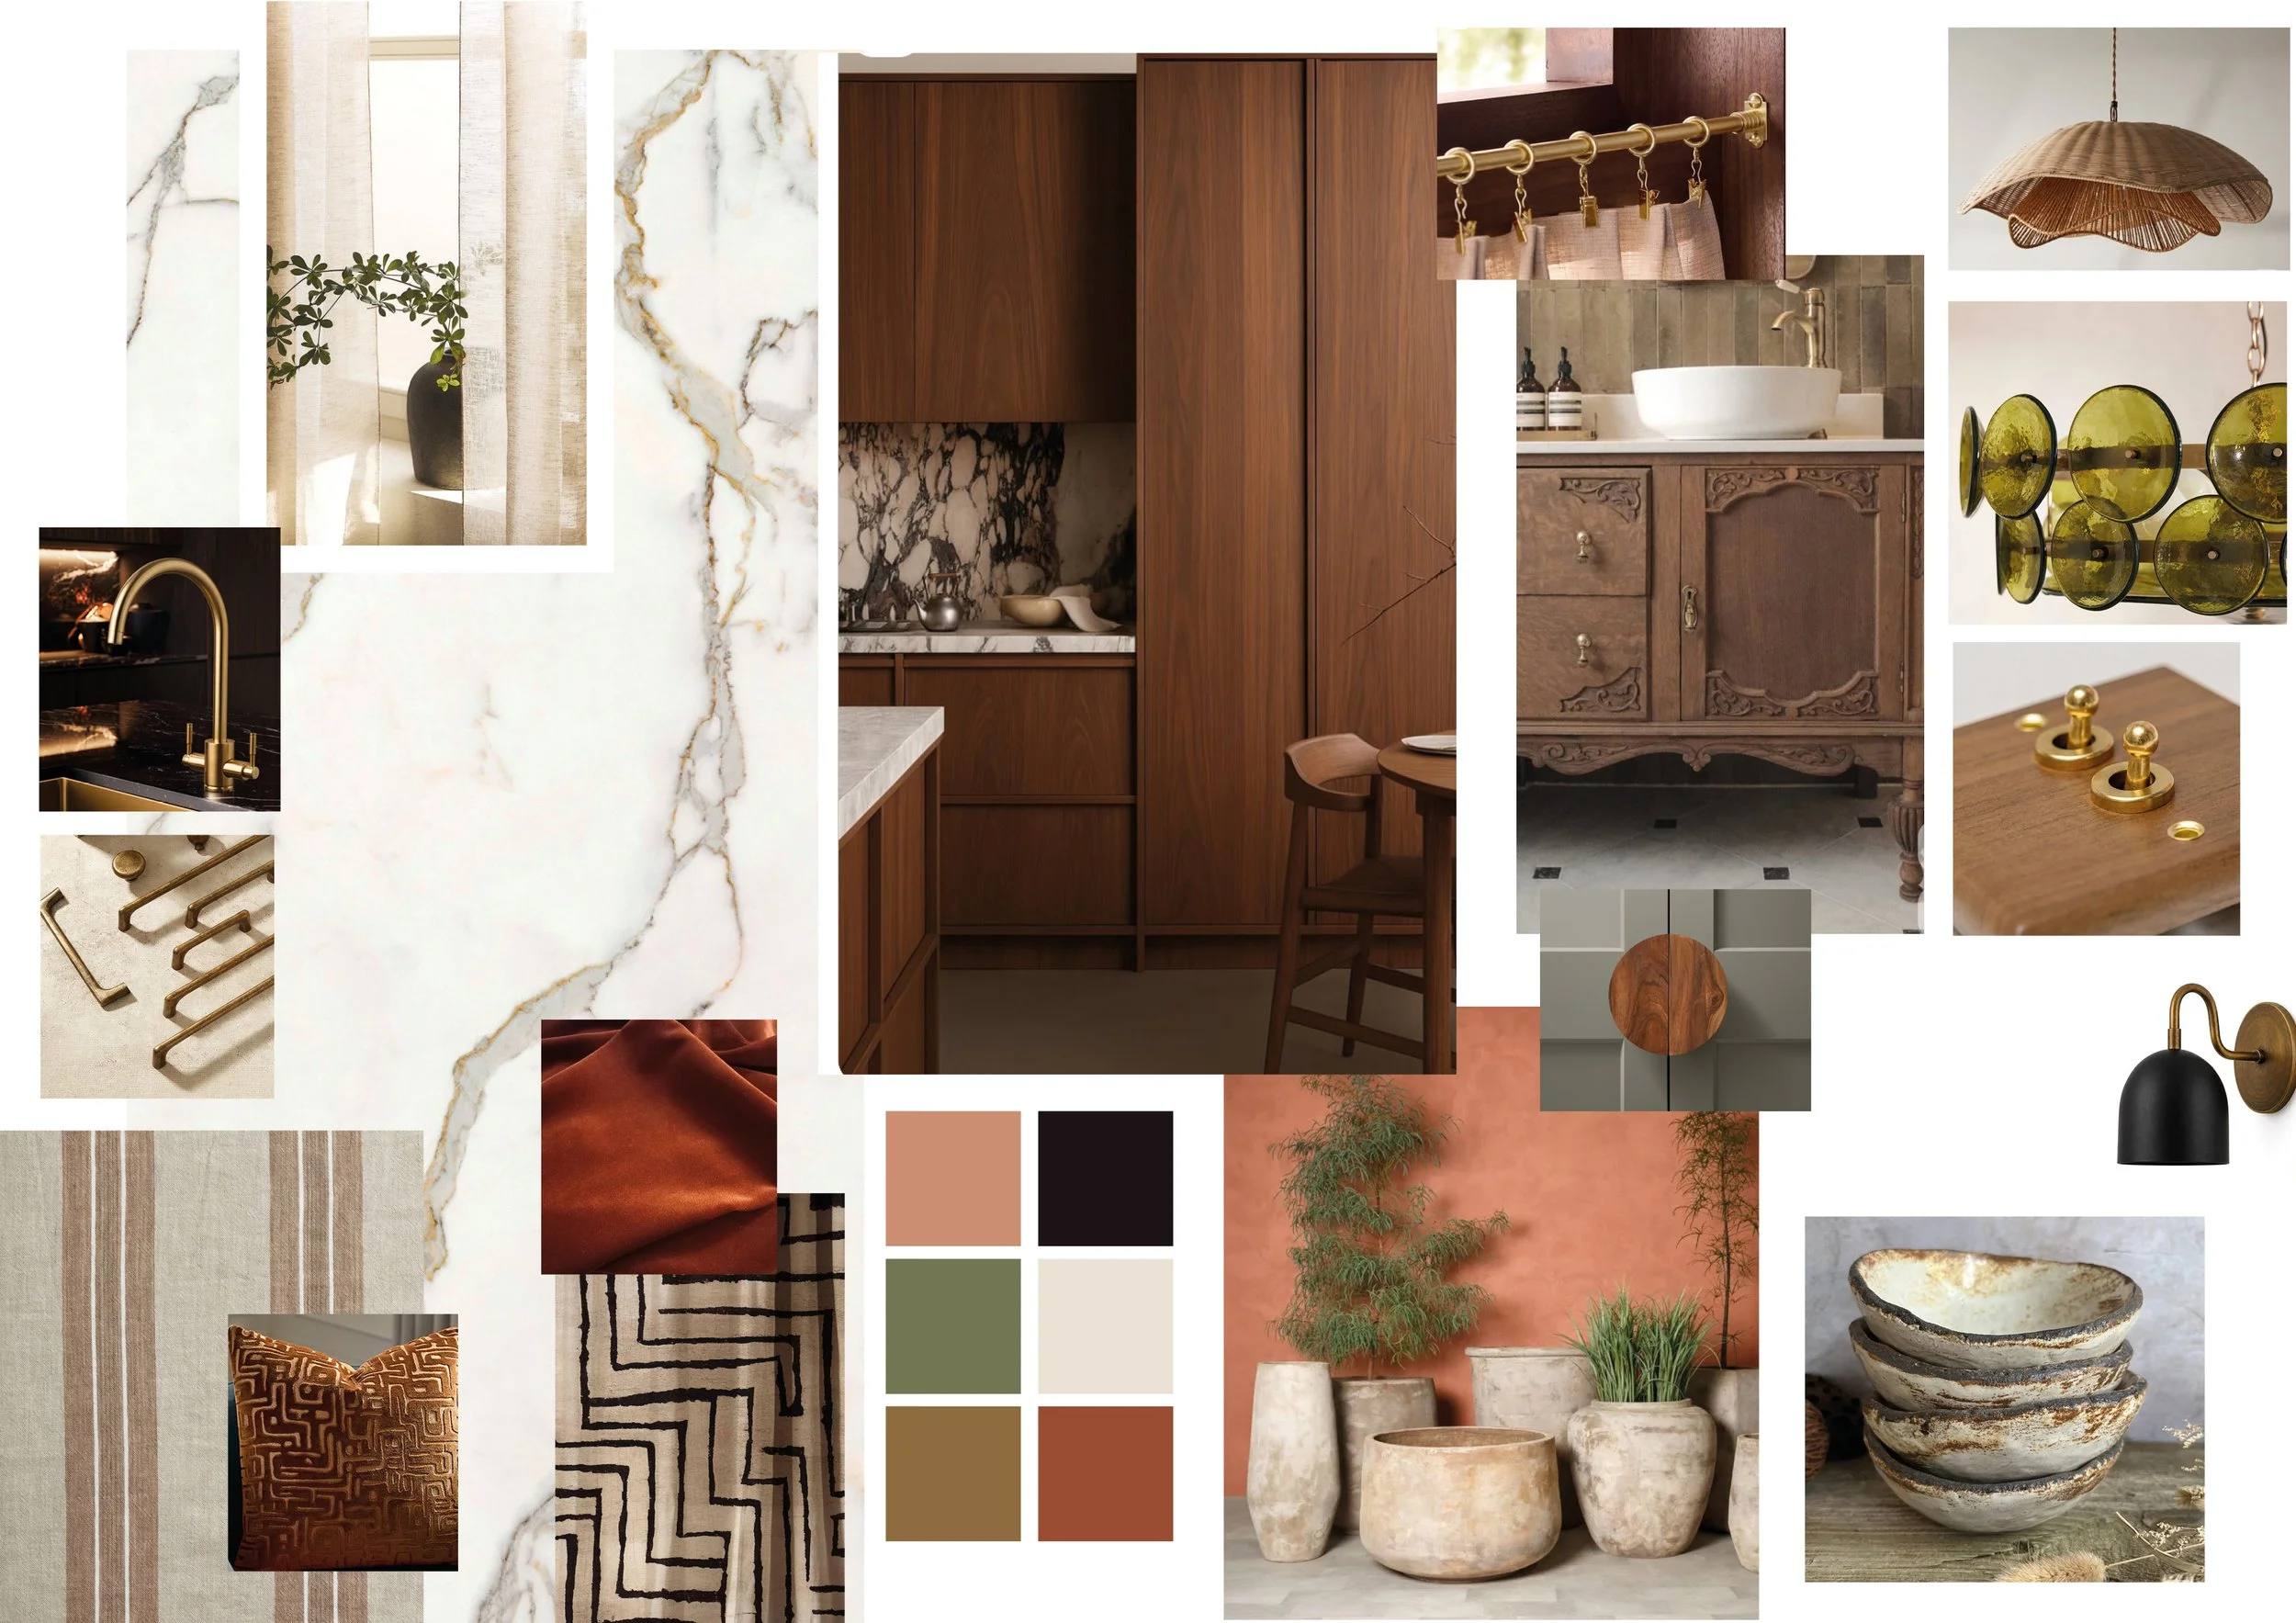
Flooring:
For this project I used wood laminate for the first time ever. I always opt for real wood or engineered wood, but my thinking here was for future repair that may occur due to tenant damage. This particular laminate flooring was in a great colour that worked with the design, but also it is installed ‘floating’, not glued down, meaning that if in future if areas of repair are needed, it could be easier to do so. And if ever a full replacement was needed, perhaps prior to a sale in future, it would be easy enough to remove and replace.
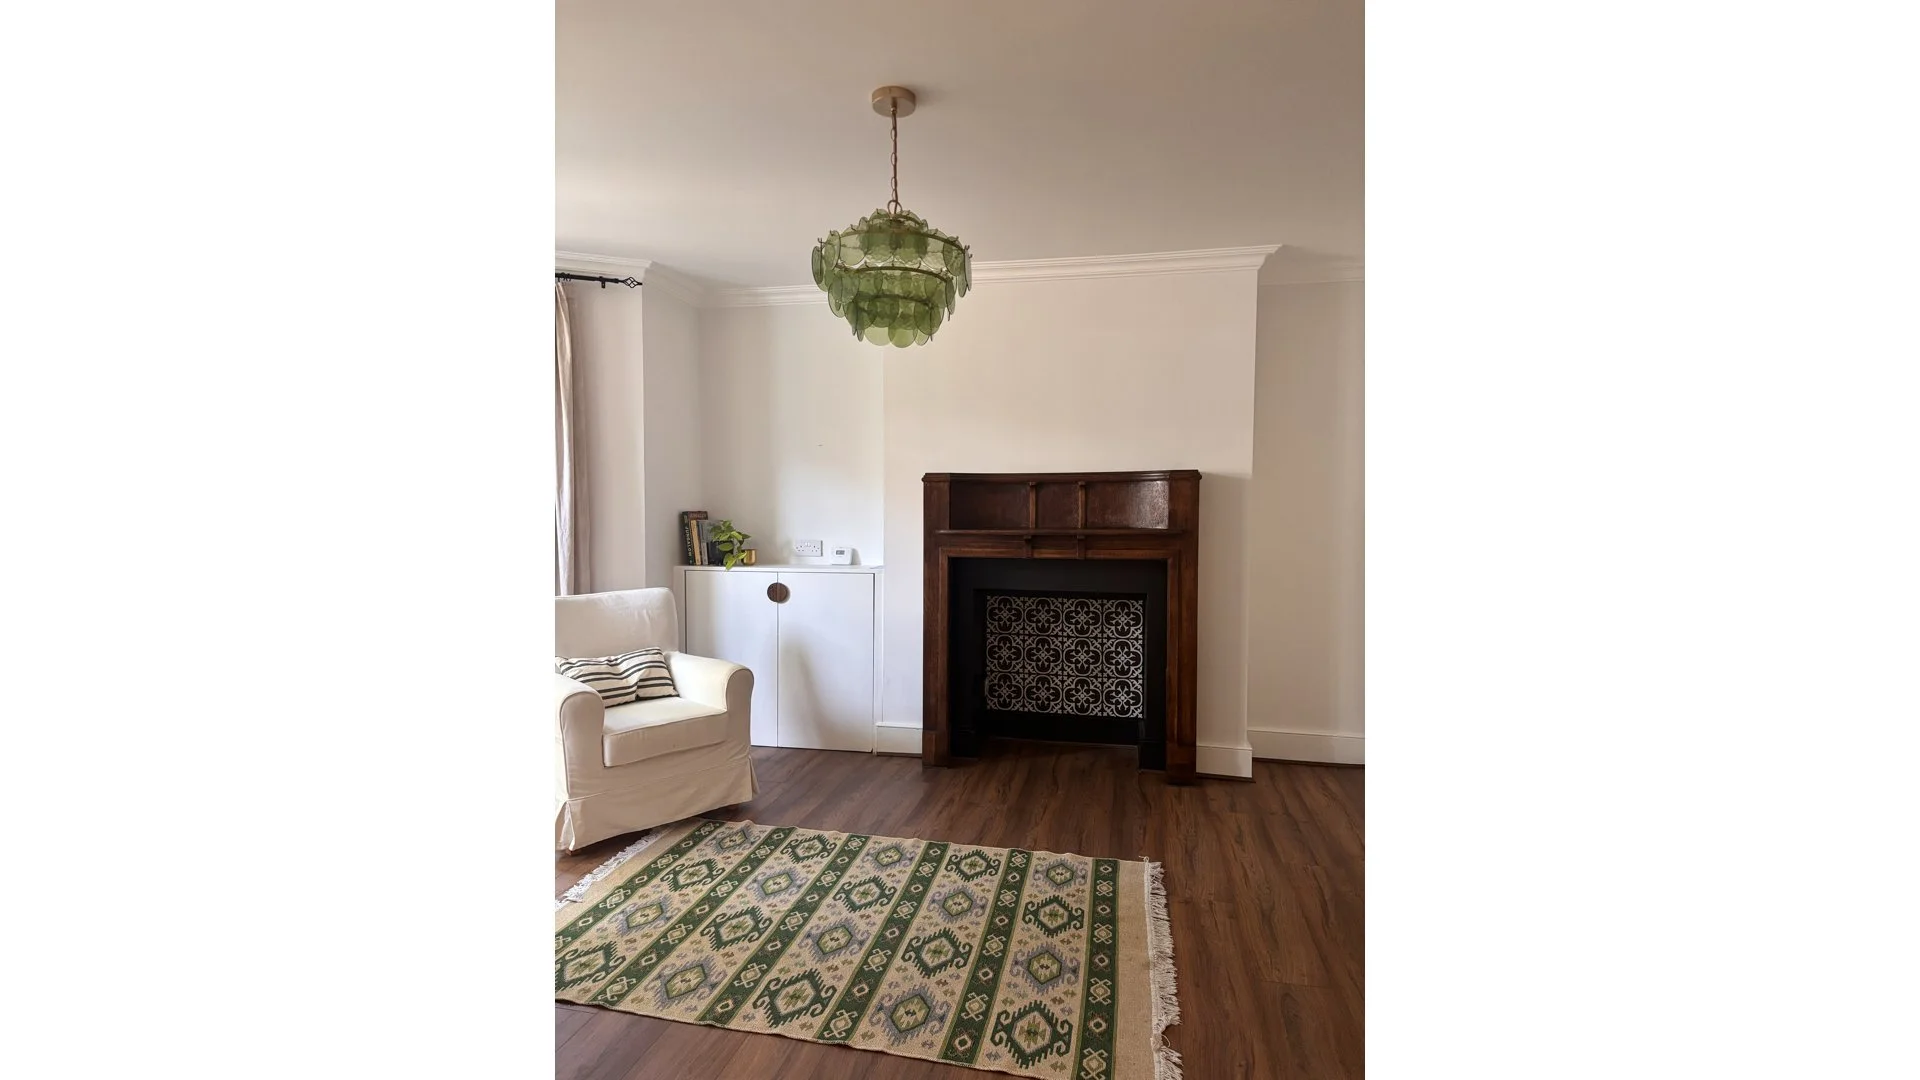
The Livingroom:
I chose a warm white to colour drench throughout the apartment, developers often use harsh trade white or magnolia, but I definitely steered away from those. I tested a number of off-whites in all of the rooms to make sure it looked good in all light. This is also a top tip for practicality in a rental because any scuffs and re-decorating between tenancies can be quick and easy – just keep a spare tin of paint at the property.
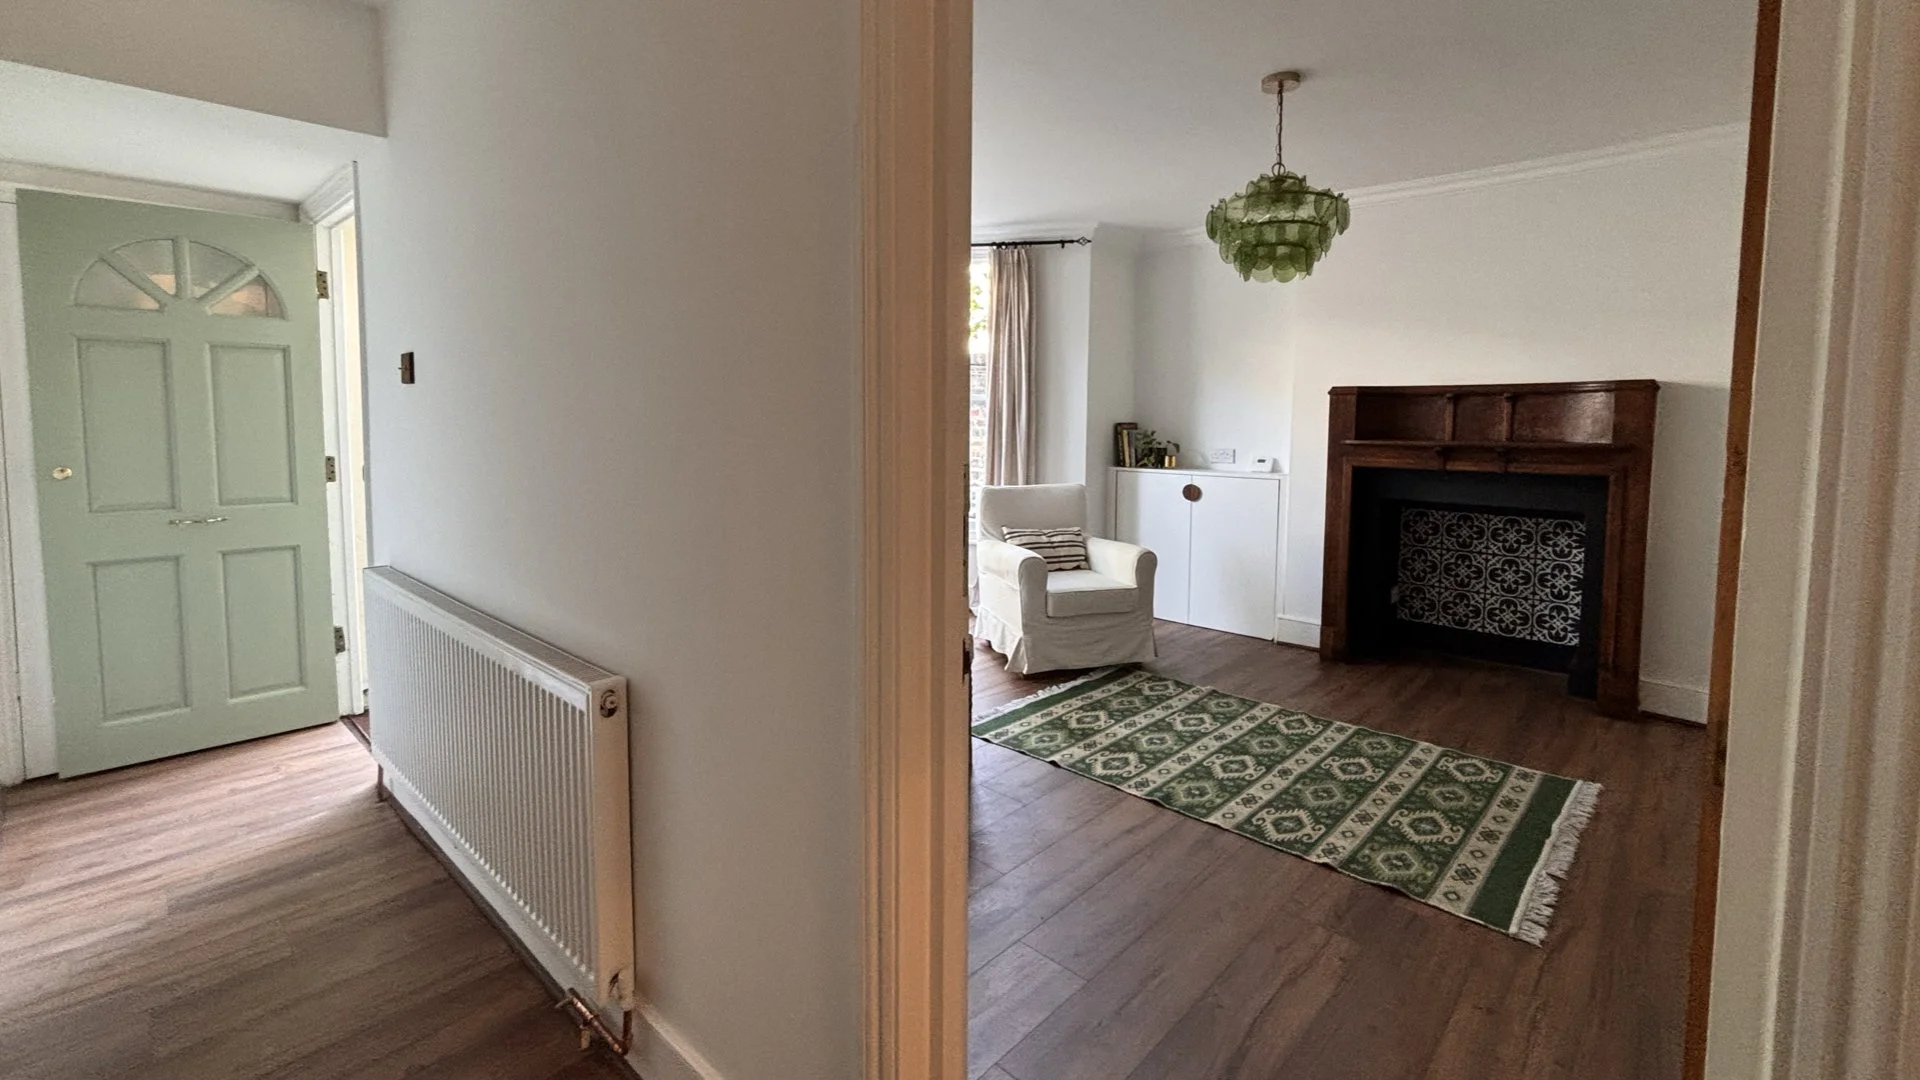
And as much as I absolutely wanted to save the original marble fireplace in the livingroom, it was beyond saving, but the walnut fireplace rescued from the kitchen made a good replacement, I restored it and added some black and white tiles to make it more of a focal point.
I kept the lighting simple with a central pendant in green glass and sourced some real linen in a natural colour from my local fabric store at a great price for the curtains, I love adding a touch of relaxed luxury to a home, and you will definitely feel the quality of the natural material here every time you open or draw the curtains.
The Kitchen:
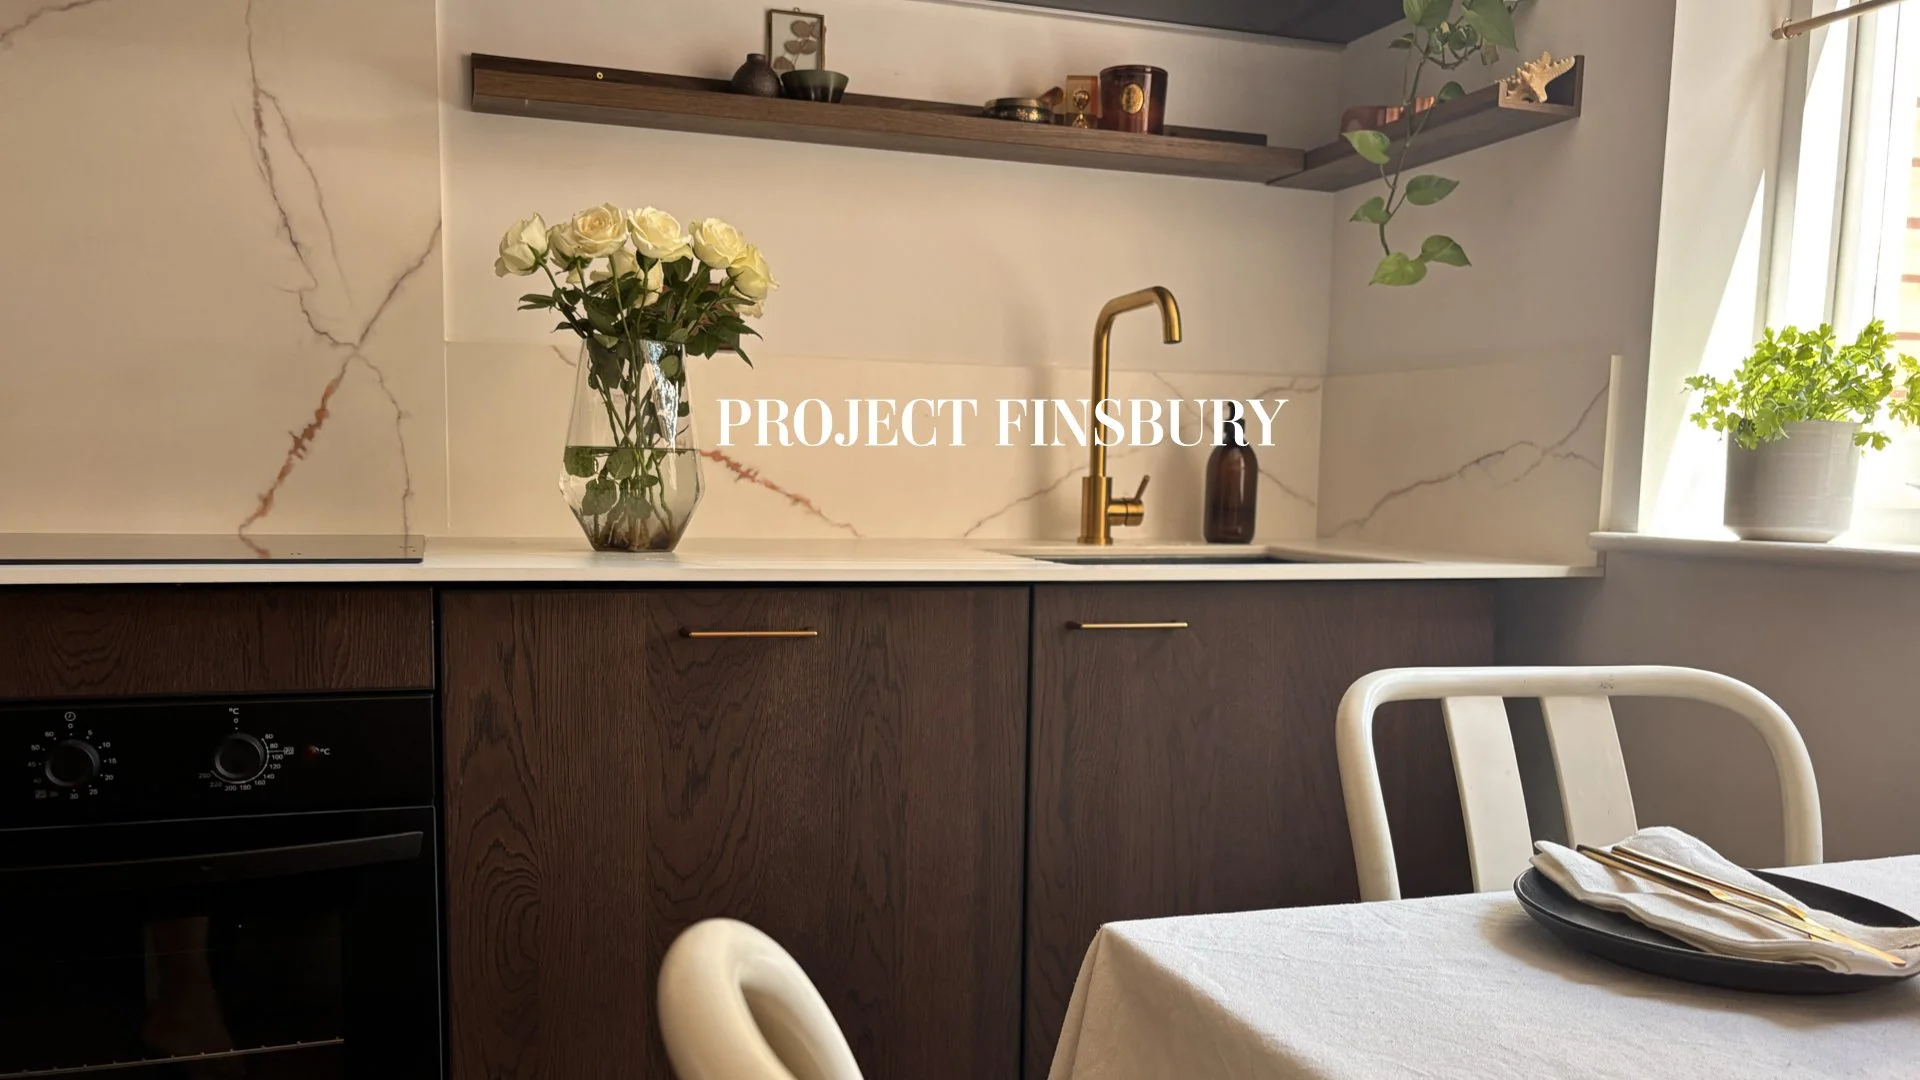
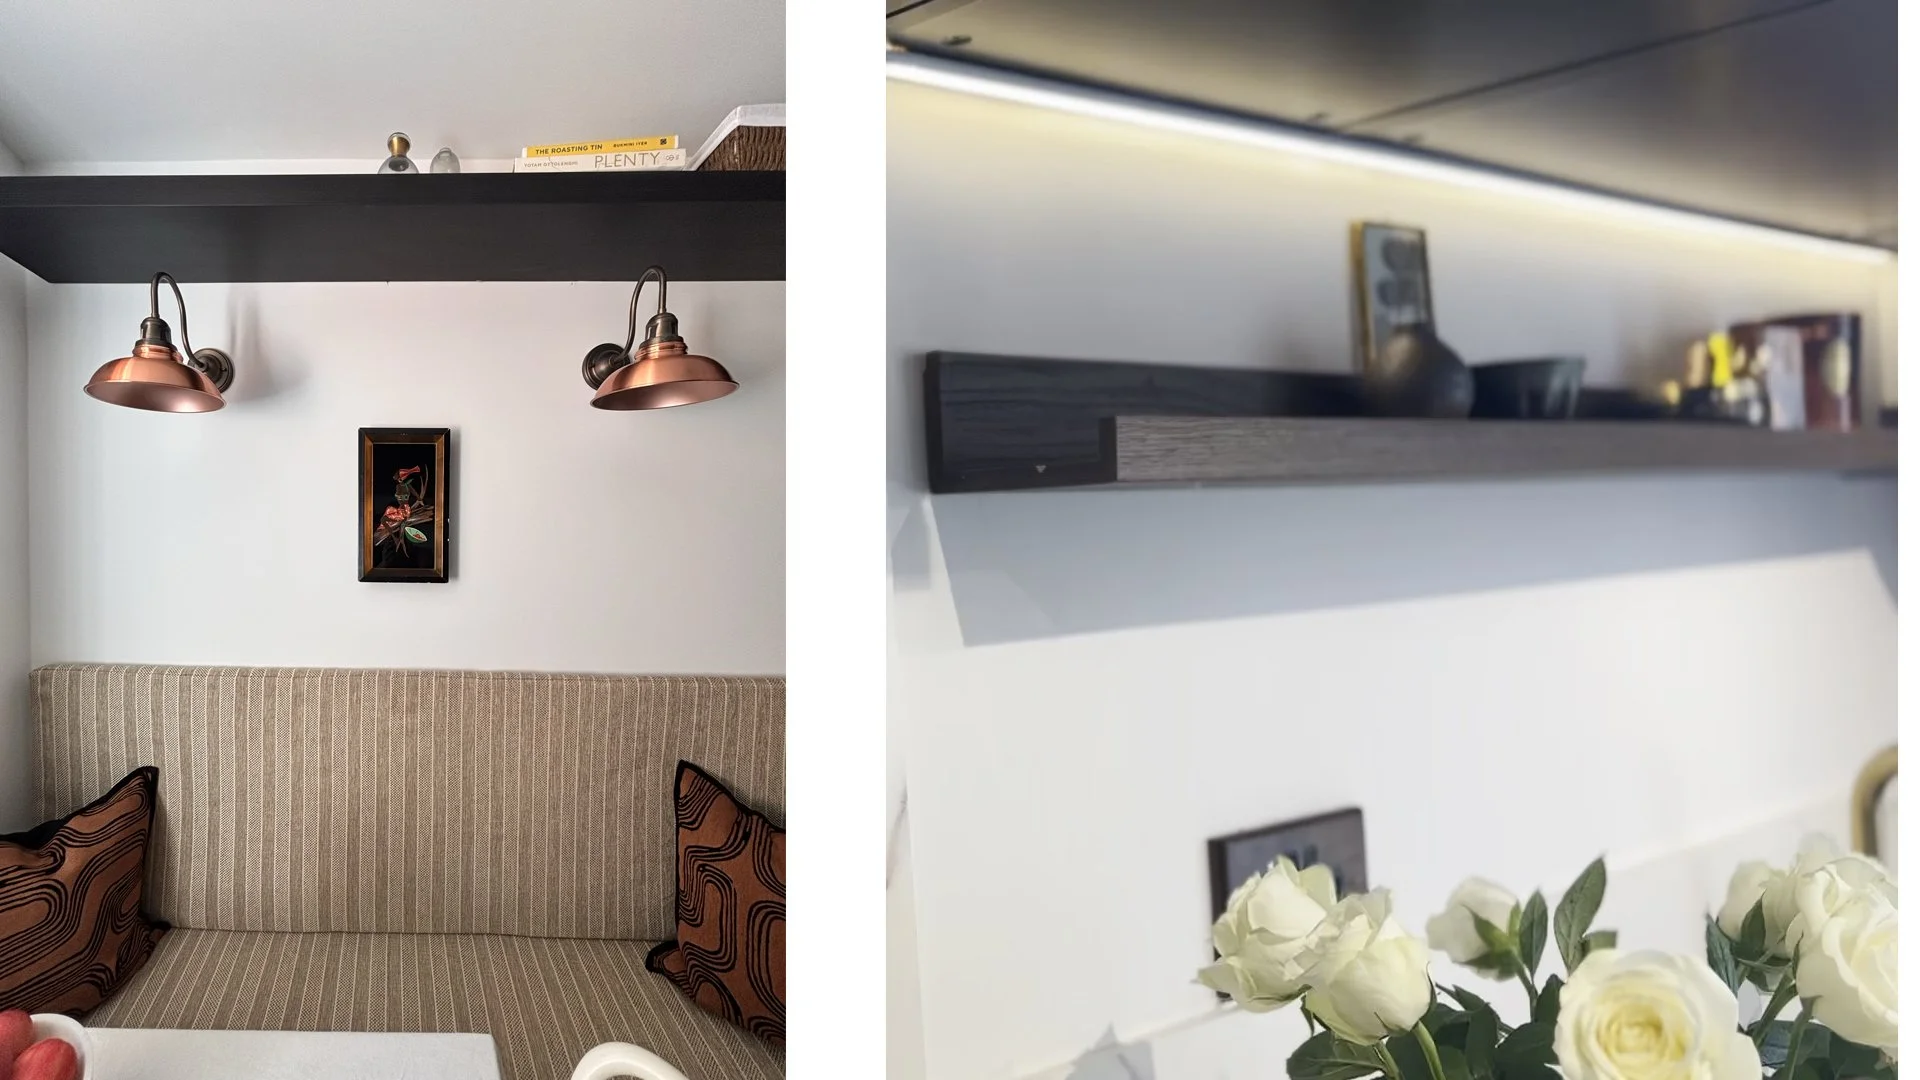
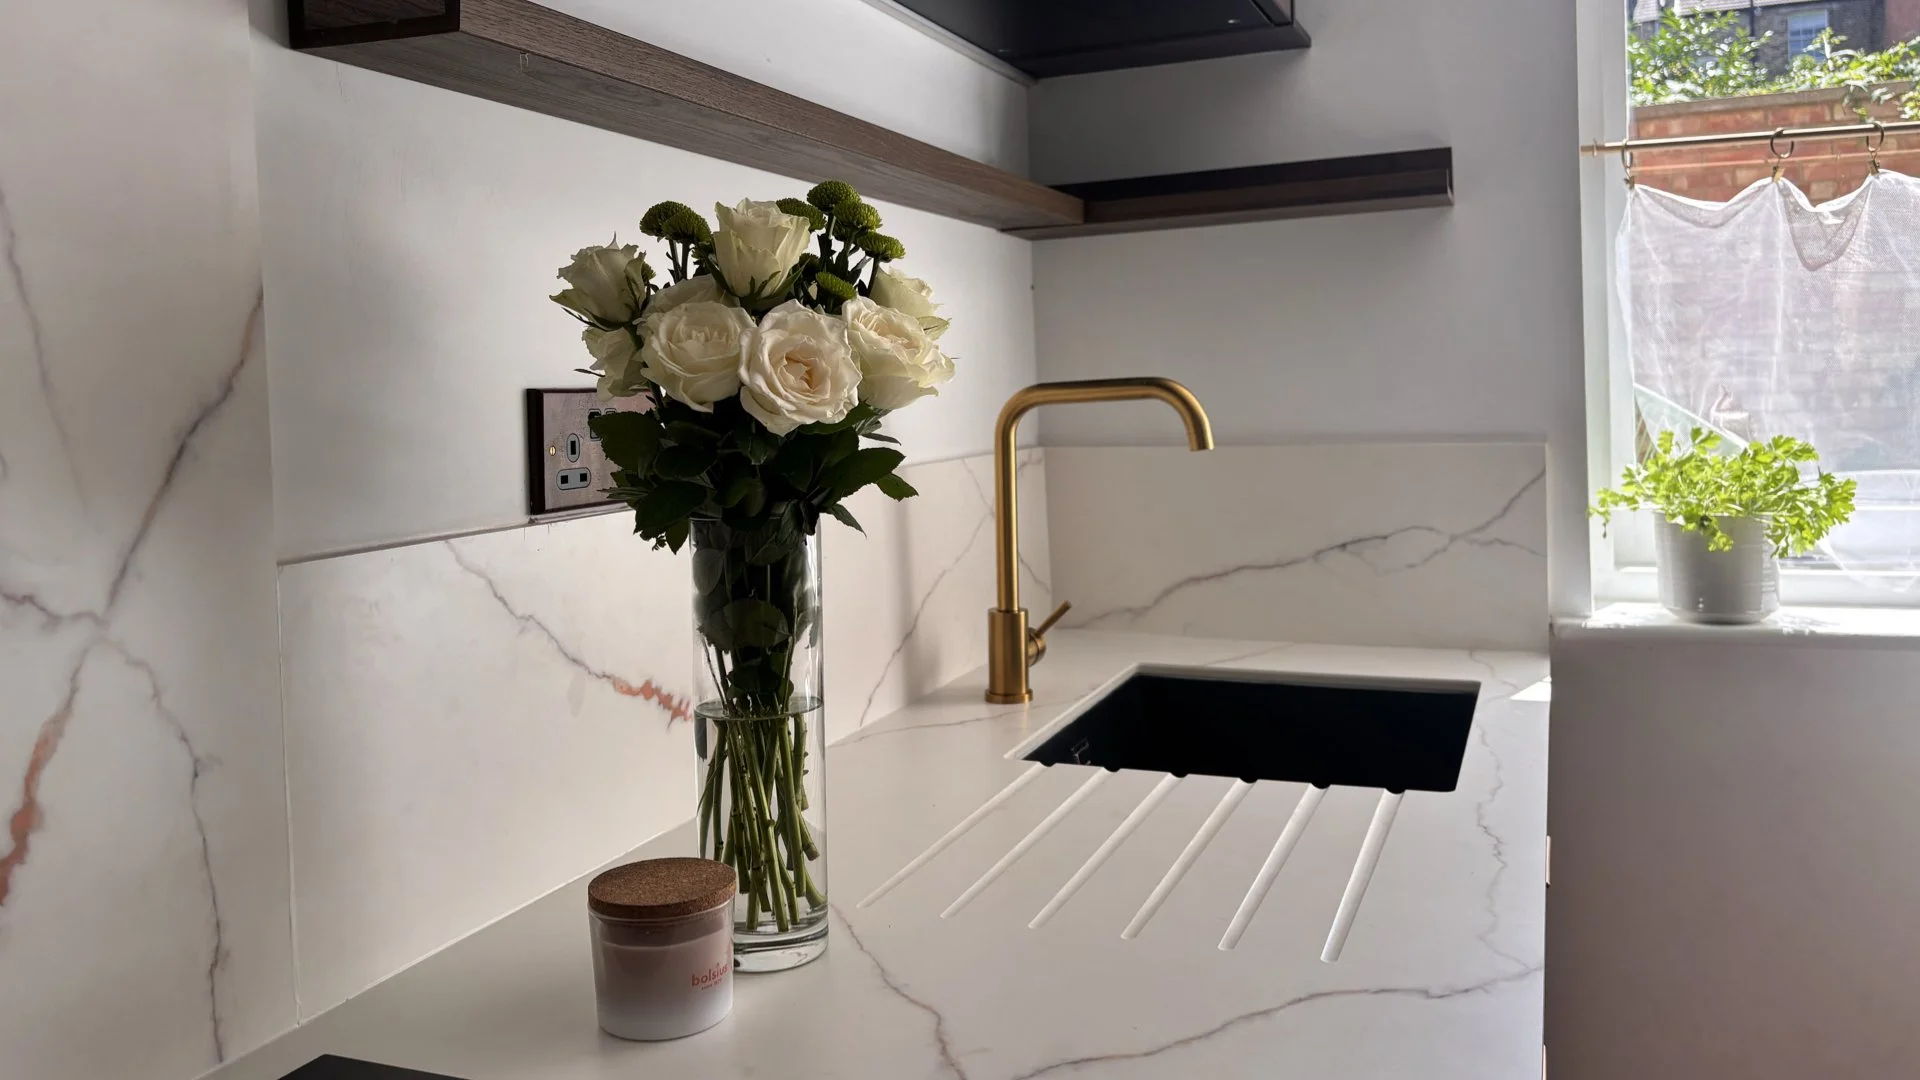
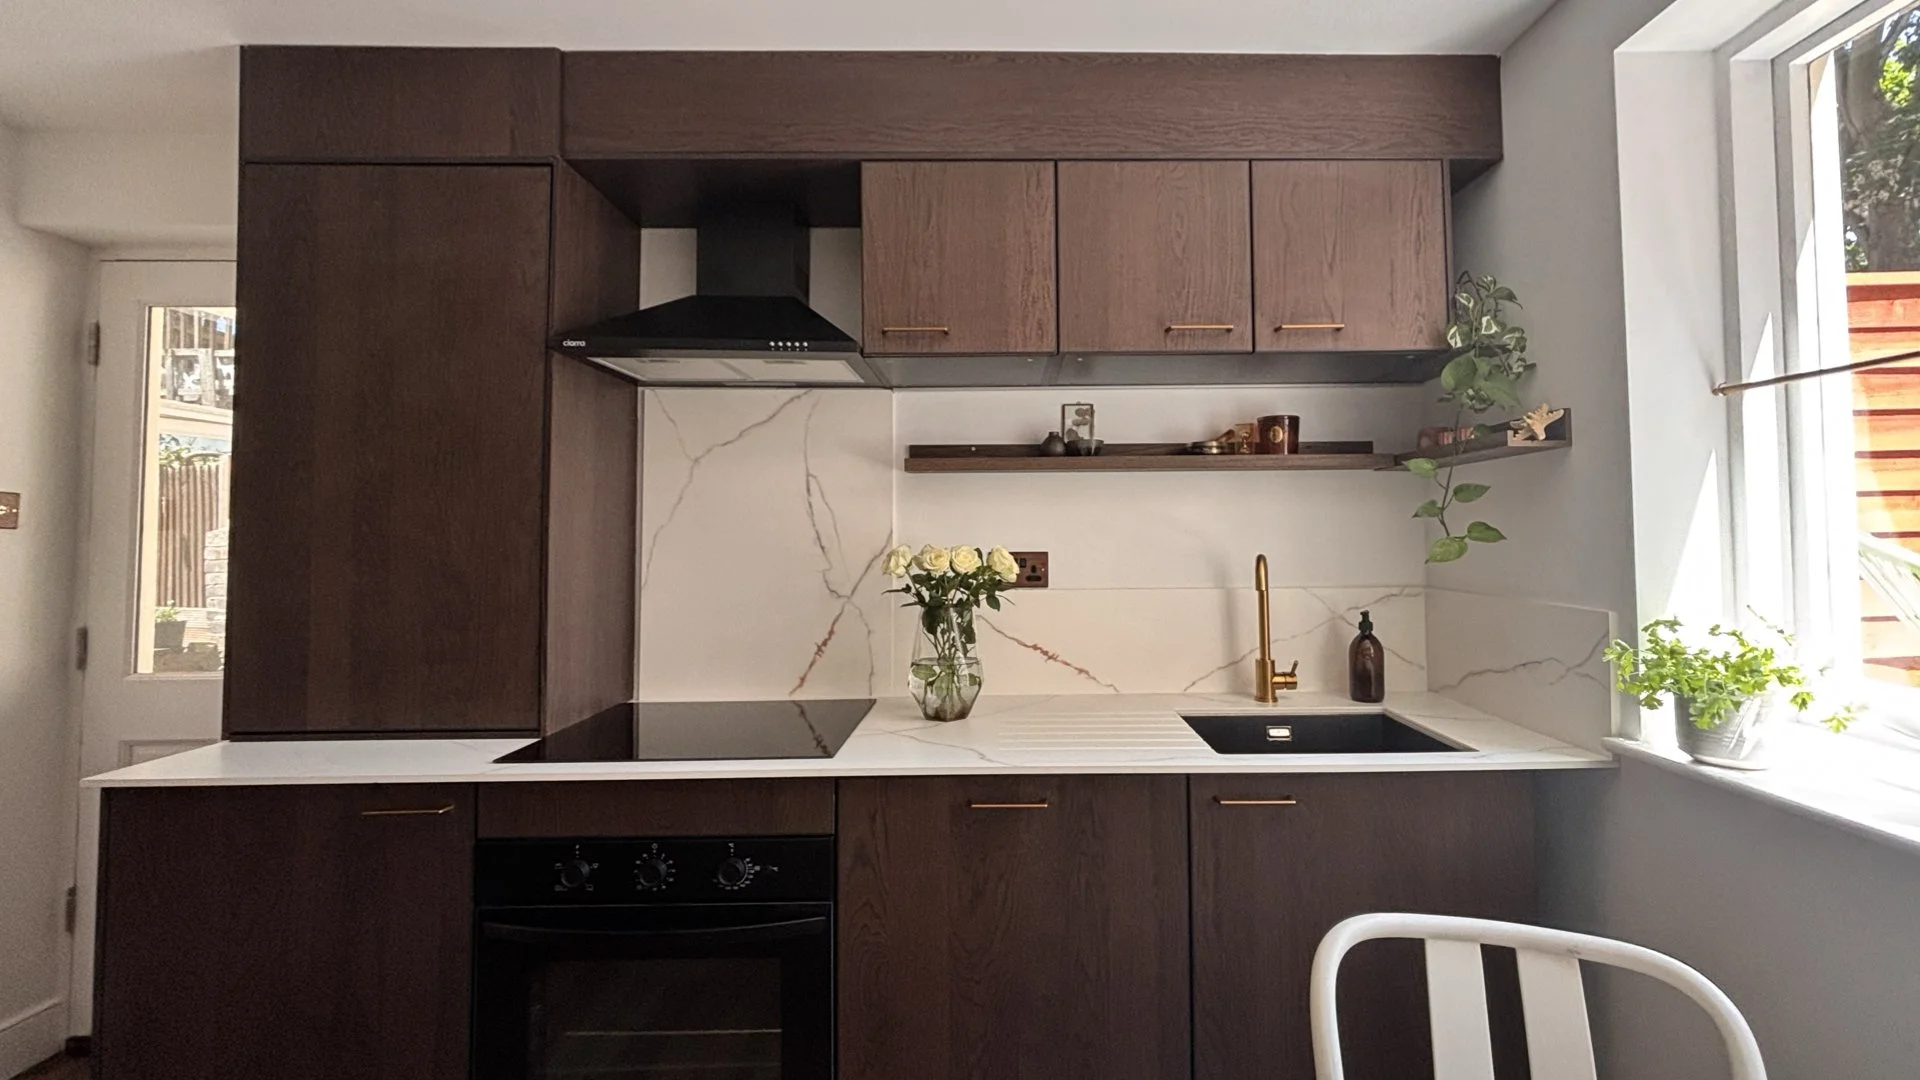
I used one of my favourite design tricks here – Ikea cabinets - but make it luxe! Ikea had one of the most budget-friendly walnut kitchens I could find in their Sinarp range, and I paired it with the black carcasses, instead of the white, I felt it had more of an expensive look and feel. Rather than sourcing everything from Ikea, I sourced some great antique brass finish cabinet handles to up the luxe factor and mixed and matched open shelving with closed storage.
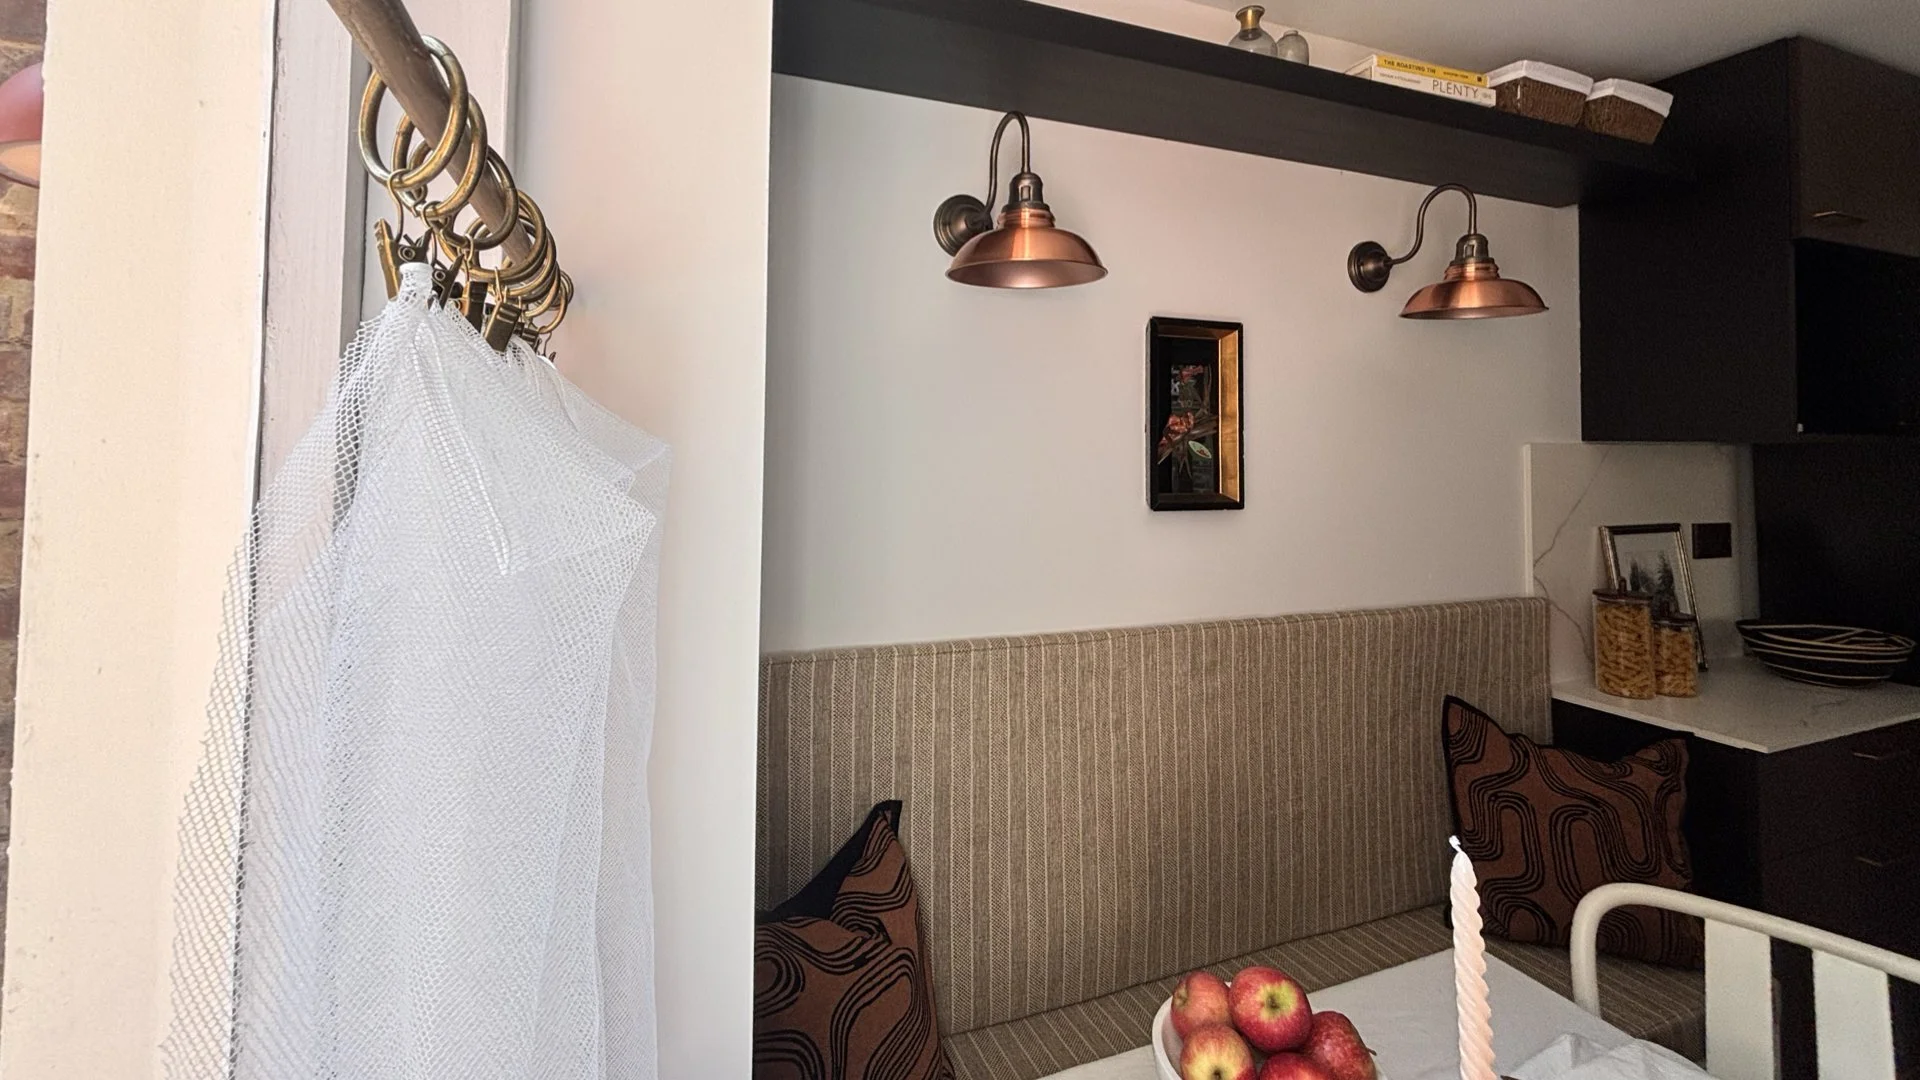
I designed in the banquette seating with storage for a comfortable place to sit and chat, or read on those lazy weekend morning, or even host up to 6 people for a meal – quite a feat in this 2x3m space! The fabric was also sourced form my local fabric store. And I’ve always wanted to add a little café style curtain to a kitchen, and I think it work so well here with the banquette.
I absolutely love adding materials that feel good – especially those that we touch every day. In this kitchen I had another project first – the worktops are new-ish material called Compact Laminate, which come in at about half the price of quartz. I ordered samples to test and I was very impressed by the luxe velvety feel of the material – almost like a leathered quartz or marble – so I thought I’d give it a try this time! Watch this space to see how it holds up!
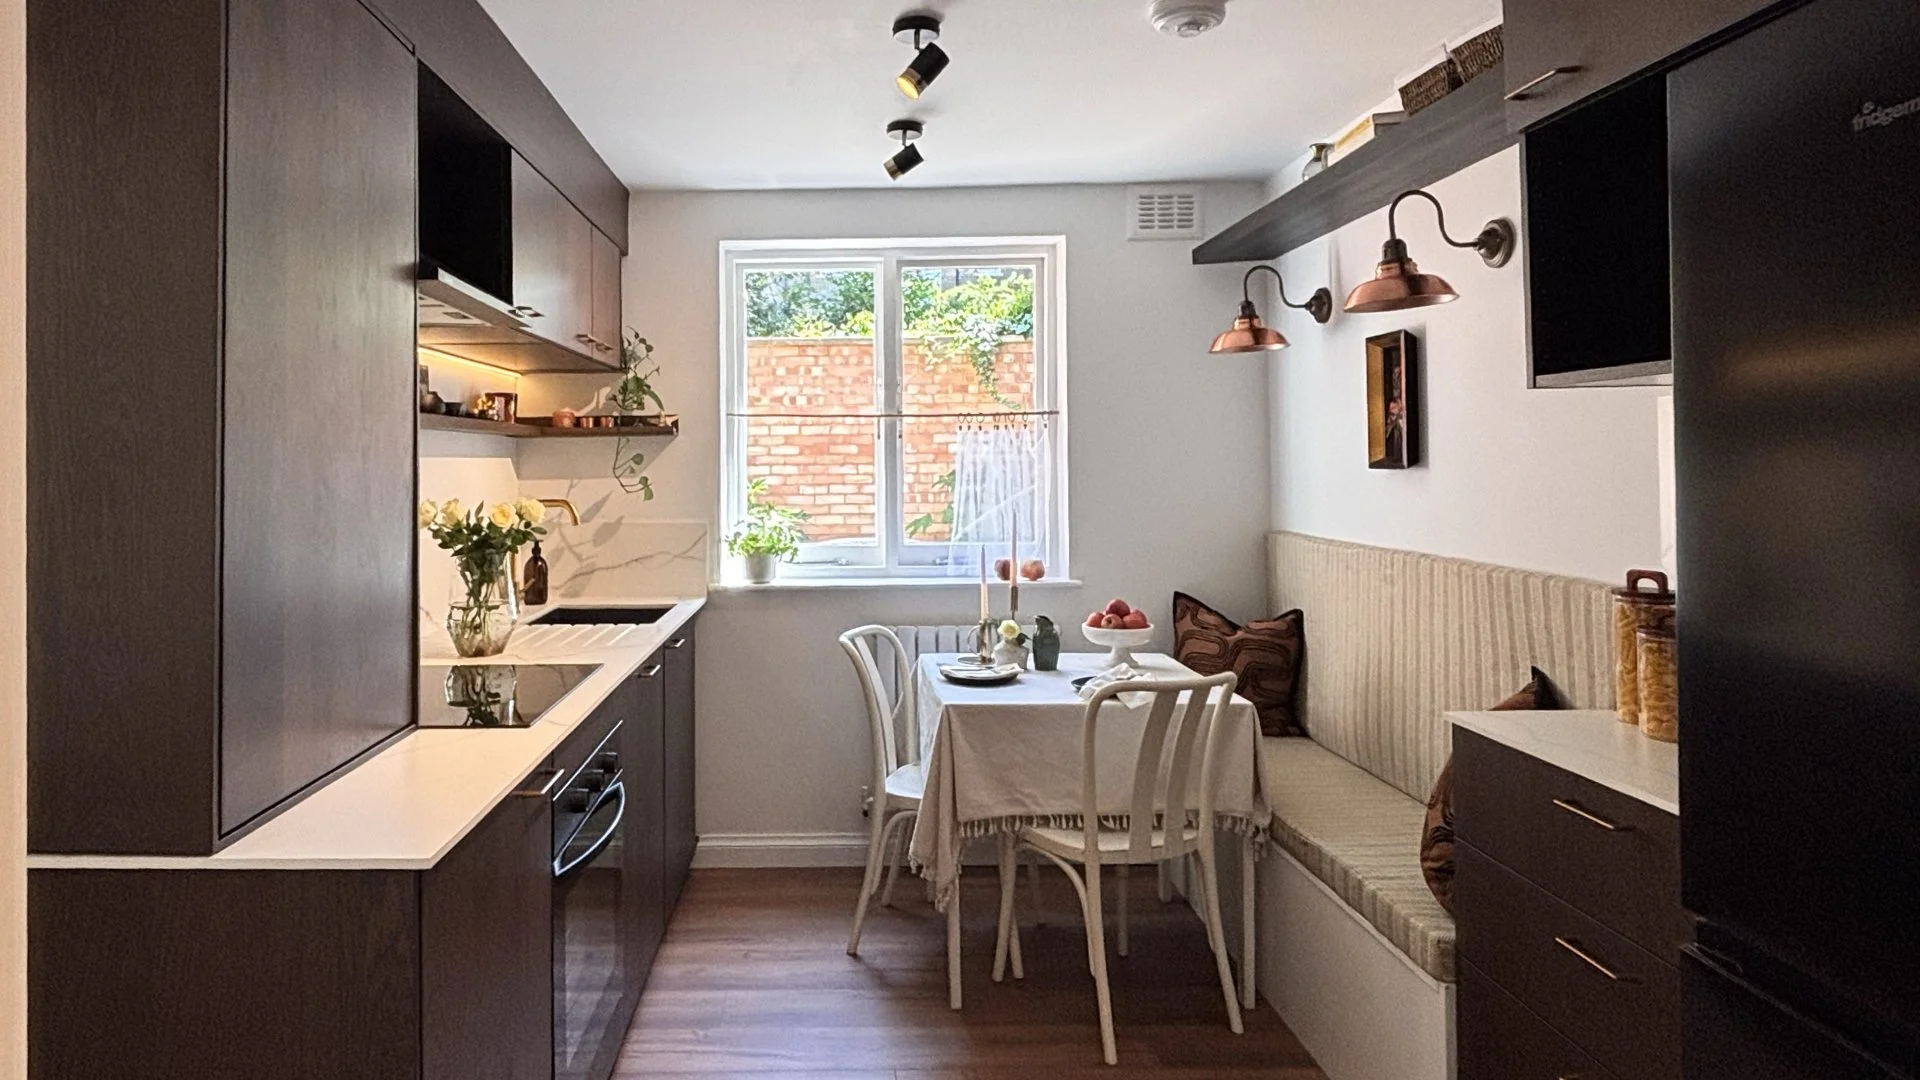
I always spend a great deal of time planning the lighting for a kitchen and it was no different here, I sourced some black and brass ceiling mounted directional spots for flexibility of light falling onto the countertops for tasks, there are also recessed spots for those times when you just need very bright light, then on separate circuits, I’ve installed wall lights and an under cabinet LED above the sink for moody and atmospheric dinners in the banquette area. And all lights are always all on dimmers for ultimate light and mood control.
This small kitchen took A LOT of planning, I wanted to make sure all the appliances were included, I didn’t want to sacrifice the dishwasher or a washing machine, so everything is sneakily integrated.
The Bedroom:
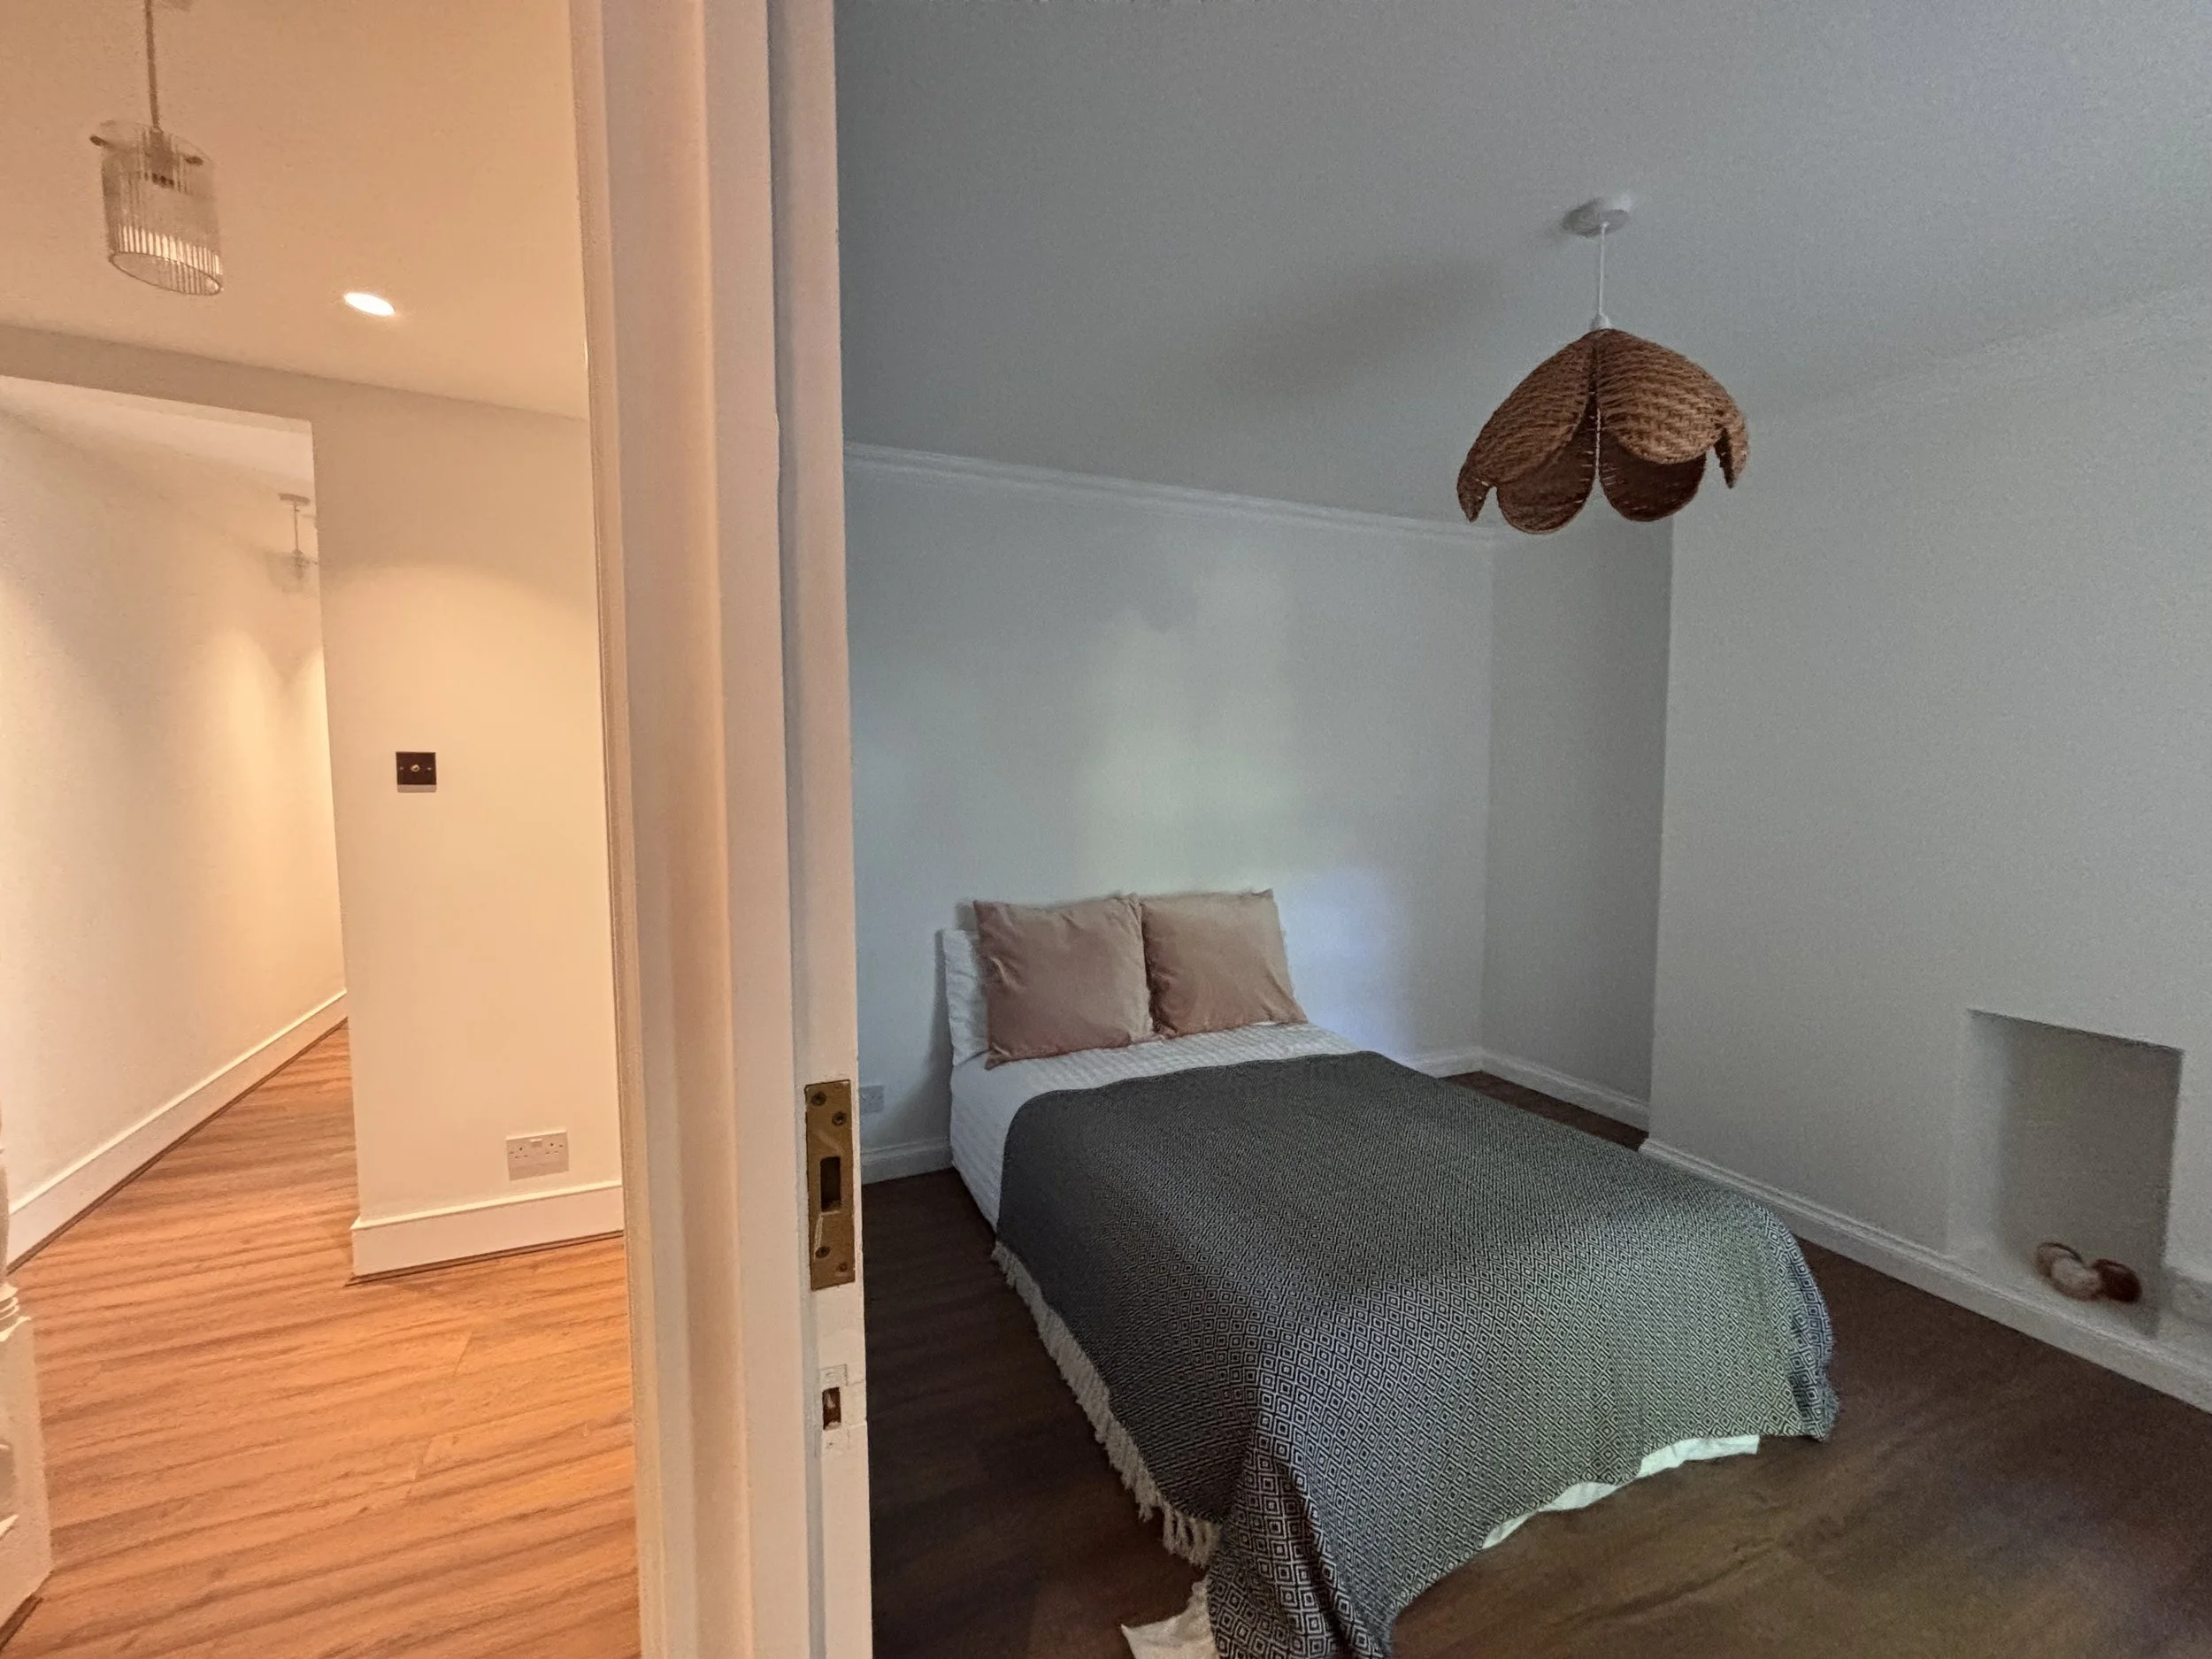
The bedroom in its new cosier location in the apartment (where the old kitchen used to be) looks super clean simple now, but all the old kitchen cabinets, appliances, plumbing, fireplace and boiler had to ripped out, and relocated. The tenants had their own wardrobes so I may add built-ins at a later date.
The Shower Room
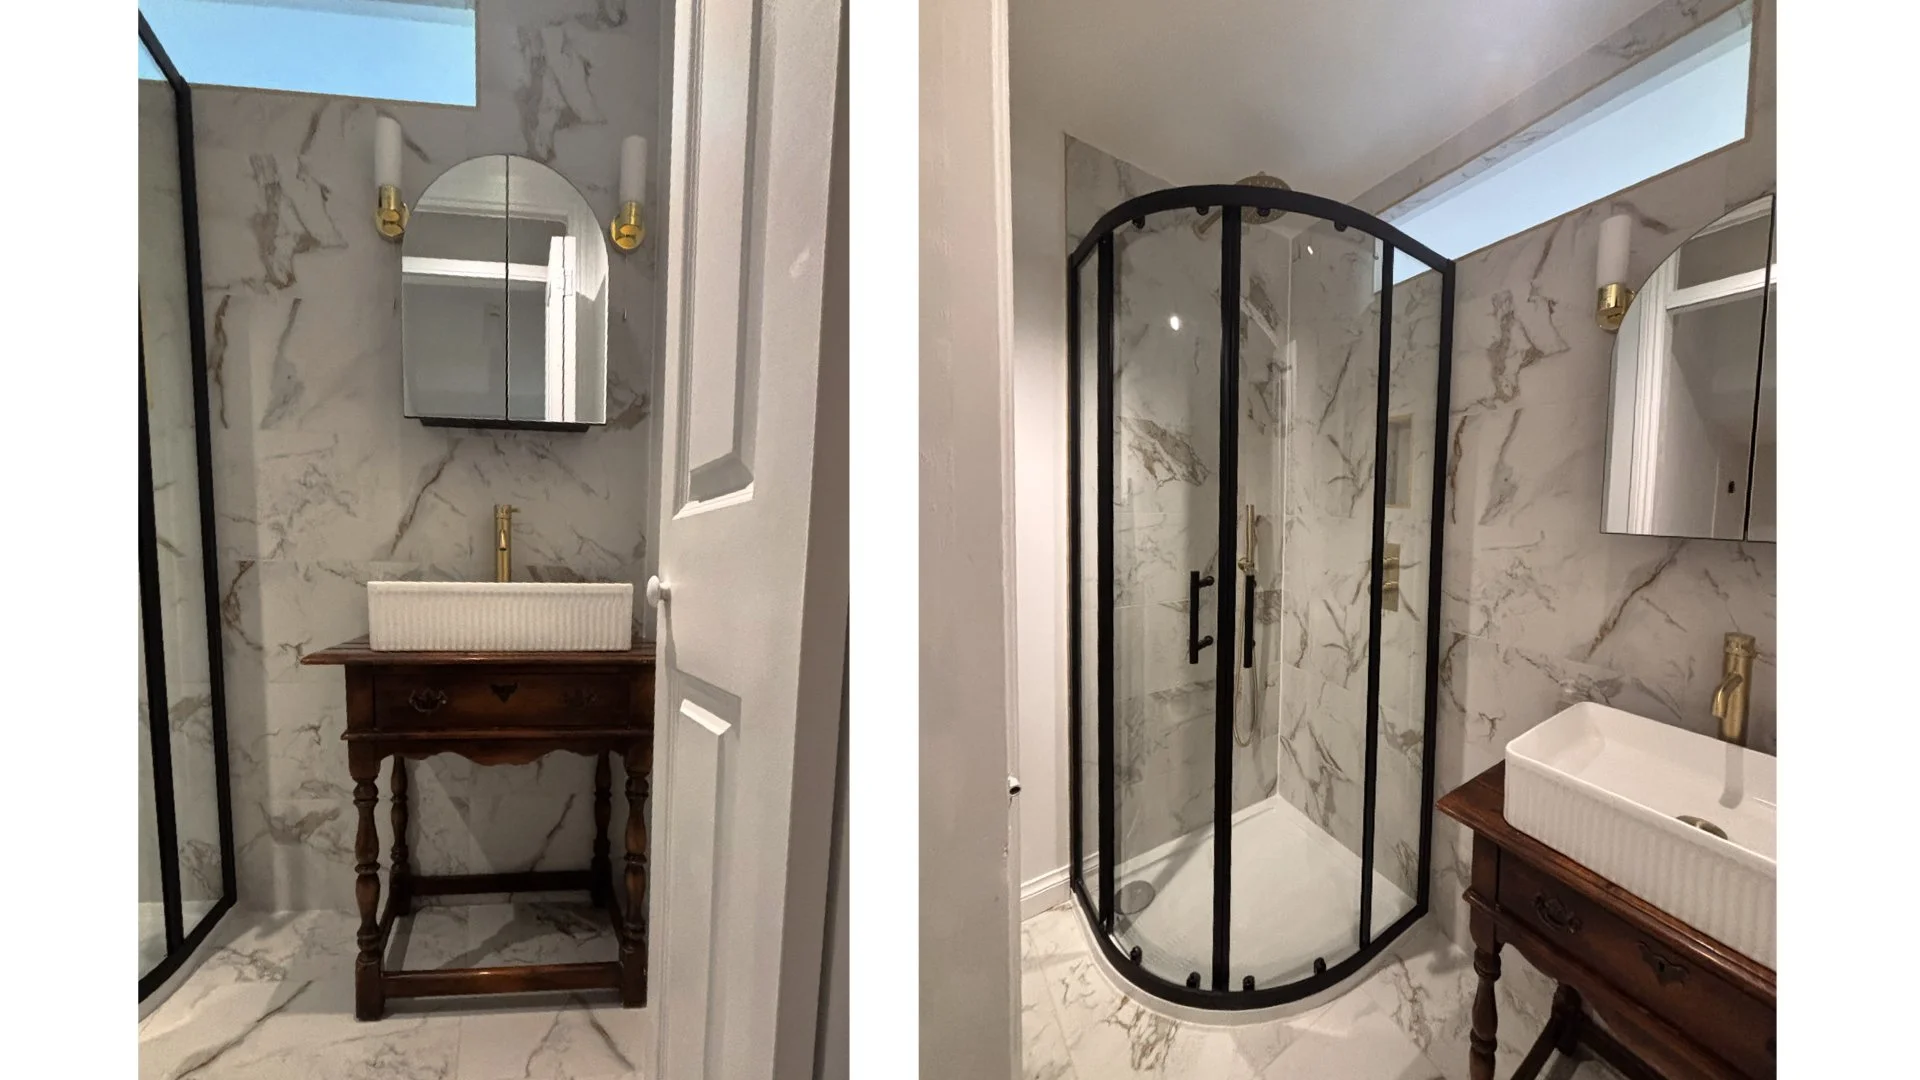
For the new shower room, I followed the theme of the gold veined tile, brushed brass tap and shower fixtures, and black details on the shower enclosure and heated towel rail. I also sourced some oversized walnut door knobs to upgrade the simple white cabinets in both the bathroom and the livingroom.
Again, the lighting is carefully planned, recessed spots for strong light when needed, but wall lights on either side of the arched mirror cabinet are on a separate circuit for more a more relaxing atmosphere.
I spotted the antique wood cabinet in a second hand store and asked my plumber to adapt it for the vanity, I also applied a specialist clear waterproof coating to the top to protect it from water damage.
Even though the mirrored wall cabinet was a high street purchase, I always get my electrician to upgrade by wiring and fitting a shaver socket inside – so useful for charging electric toothbrushes.
The Styling
By the time I got to the styling on this property, I’d already had two offers from prospective tenants, so my time was very limited. I do think styling is so important when selling or letting a property, the right styling really gives viewers an idea of how they can use and live in a space. I did manage to sparsely style the livingroom and bedroom, and luckily I I had the opportunity to get some good footage of the kitchen before the tenants moved in.